Define a Print Job Model
You need to define a print job model before you can print data from form components.
Note: Printing data in the Uniface IDE is only possible in the editors available from the More Editors menu.
- In the Uniface IDE, choose Print Setup from the Main Menu ( ≡ ).
- Clear the Print Job Model field, then click >> to display a list of available models.
- Click New to open the Define Print Job Model dialog, or select a model and click Edit to change an existing model.
-
Specify the name and other details of the
print job model.
- Name—print job model name
- Device Type—device translation table to use for this print job model
- Print Queue—destination of the printed output
- Print Options—additional operating system options
- Device Mode—predefined page formatting for a specific Device Type
- Margins—margins of the printed output, expressed in terms of lines and characters
- Print using colors
- Print black on white
At the very least, you need to specify a Name and the device translation table in Device Type.
- Clear the Device Type field or enter a profile (for example P_*) and click >> to display the list of available device translation tables. Select a table and click OK.
- Click OK to save the print job model.
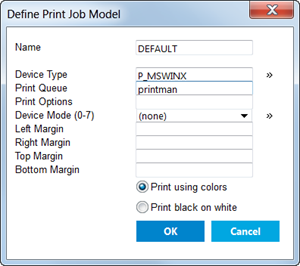
Typical Print Job Model for Windows
The following print job model uses the enhanced
printing device translation table for Windows (Device Type:
P_MSWINX) and invokes the Windows Print dialog box so that
the user can configure and control printing (Print Queue:
printman).