Define and Use Menus
You can define menu bars, context menus, drop-down menus, and dynamic menus for the application as a whole or for individual form components. Menus are defined and deployed in libraries.
Tip: To maximize reuse of menus, you can first define the drop-down menus, and then reference these in higher-level menus and menu bars.
-
Choose , and select the library.
The Open Menu window displays a list of menu bars, if there are any.
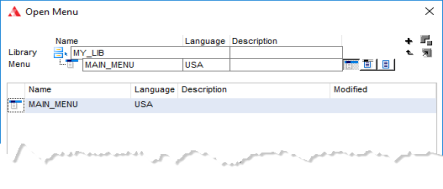
Notice the menu icons. These filter the list of menus objects and determine the type of menu object you create.
 Menu Bar
 Drop-Down Menu
 Popup Menu
Note: If you have already defined menus during the session, the menu editor is automatically opened at the last edited menu. To open or create another menu, choose or .
-
Enter the Name and a
Language code, and click the icon for the type of menu you want to create.
Then click OK.
You may be prompted to confirm the creation of a new menu before the Define Menu window opens.
-
Define the menu items.
-
Click New and enter the
Item name.
Tip: When defining a menu bar, each item is a drop-down menu. If the drop-down menu has not yet been defined it is created on-the-fly. To edit the drop-down menu, double click the menu item or choose .
To right-align items in a drop-down menu, enter a vertical bar (|) in front of the text you want to right align. This functionality is specific to Windows platforms for both development and deployment. If you are deploying your application to a platform other than Windows, do not use a vertical bar.
-
If you want to display an icon before the item text, use
a GOLD ! (exclamation mark) to define a list string in the Item field:
{
@Image |^Glyph!} OptionTextFor example:
@..\images\file_open.png!Open fileImportant: Images are only displayed in menus if at least one menu property is set in the application .ini file. For example:
;usys.ini
[application]
menu=umenu(font=SansMedium)
- Select the menu item Type and set the other properties in the Details section.
-
Click New and enter the
Item name.
-
Click Triggers and
edit the option triggers of menu items to define the
actions that are performed when the menu item is activated.
You can also edit the preDisplay trigger to control the appearance of the menu before it is displayed.
- Choose to compile the menu.
-
To associate a menu with an application
shell or form:
- Open the form or application shell.
- Select the object that requires the menu.
- Select a menu as the Menu Bar (Initial Menu Bar for application shells) or as the Pop-up Menu.
- Recompile and test the application shell or form.
- To test a menu run the application shell or form using the /tst switch:
